Monday, December 11, 2017

Gift Ideas for Quilters: 2017 Edition

With two weeks to go before Christmas, you might be wondering what to get the quilter in your life. Here are some ideas, either taken directly from my own list or based on products I've used and loved this year. Please note, I was not sent any of these products for free, these are simply my opinions!

I’ve been a subscriber to the Tagged label club from Sweetwater for several months. Each month I receive a beautiful, personalized label (sometimes two!), ready to be affixed to a quilt or other project. I keep meaning to make a zipper bag with one! These labels make a great gift because they are both practical (who doesn’t need a bit of a push labeling their quilts?) and this is a subscription-based product that won’t break the bank that the giver will enjoy for months to come.

I love enamel pins in general, and I especially love this little pin and the story behind the word “sewist.” I’m a lover of words, and I feel having the perfect word to use is important. “Sewist” combines the words “sewer” and “artist” and has the advantage of not being misread as the other type of sewer (you know, the type underground that smells rather unpleasant). The pin is available is aqua and pink.

Another great stocking stuffer is one of Moda’s Matchbox quilts. These small kits include nearly everything to make a six-inch quilt. You can get one or a few of these darling little projects. 

For a more functional gift, a seam roller is a practical gift that surprisingly is not in every quilter's toolbox. I like being able to press seams quickly, especially when paper piecing. I use this curved, wooden one made for pressing wallpaper seams (a flat roller can leave lines on the fabric). It is sturdy and works wonderfully. Clover also has a smaller, ergonomic version called the Roll & Press that is readily available in quilting stores. 

One of my favorite gifts last year was a box of Aurifil thread that my husband surprised me with. It's like candy for quilters! I'm still working my way through the box nearly a year later (those spools are large). You can't go wrong with a box of neutrals, or, for something more cheerful and bright, pick up one of their many boxes curated by various fabric designers.   

Finally, the big gift on my list this year is Electric Quilt 8. I'm a big fan of Electric Quilt, but have been chugging along with Electric Quilt 5 all these years. I think I'm due for an upgrade! The new version looks chock full of great new features and I'm excited to check it out if I find it under the tree this year!

I hope you have a wonderful holiday season and find lots of quilting goodies under the tree!

Monday, October 23, 2017

DIY Washi Tape

I make a lot of quilts using precuts and often have a lovely pile of coordinating scraps leftover at the end. I generally toss them in a baggie together and now have a pretty substantial collection of scraps from various projects.

Over the coming months, in an effort to make use of some of these scraps, I'm going to work on smaller projects that can showcase these pretty little bits that I don't want to just toss. It's going to be Scraptastic!


First up: DIY washi tape. I hesitate to even call this a tutorial since there's not much to it. But for the smallest leftover bits in your stash, consider making some homemade washi tape. The uses for washi tape are endlessyou can brighten up mail, use it in craft projects, or dress up items around your house, like boxes, picture frames, or clothespins.


Simply attached doubled sided fabric tape (I used Dritz Res-Q-Tape) to scraps of fabric and trim. You can cut the ends straight, or trim them at an angle for a bit more flair.

I keep an extra rotary cutter with an older blade reserved for cutting paper. I used it for this project since the backing material on the tape might dull my other blade. Be particularly careful when trimming as the backing material was pretty slippery.

Since washi tape can be skinny (mine was 3/4"), this is a particularly good use of those really small scraps that would otherwise go in the trash bin.

I put my washi tape right to work dressing up some mail!


Saturday, September 23, 2017

Quilting with a Ruler Foot

I've been having so much fun checking out the entries for the Blogger's Quilt Festival, I can't resist adding another one! I love making all kinds of quilts, but baby quilts are my favorite to create and gift. They are the perfect size to make (big enough to be a satisfying project, yet small enough that they actually get finished!) and it is just plain fun to make something for a new little person.

This one is on its way to the new little girl of a wonderful friend from college. It's constructed entirely from half square triangles (I have a bit of a thing for HSTs...) in a herringbone pattern and made in Gooseberry fabric by Vanessa Goertzen of Lella Boutique.


This is the first time I quilted a quilt using my ruler foot. There is a learning curve on this technique, to be sure. I'm still learning to love it, but I think we'll be friends with time. I like the design possibilities that it opens up, as I am not one of those people who can free motion beautiful designs. For this design, I used the large curve on Piece 'N Quilt's 4-N-1 Machine Quilting Ruler. I'm still trying out different rulers and seeing what I like best, but I certainly like the flexibility of this one!


Some tips for ruler work:

Practice! Spend some time playing around with samples and getting a feel for the technique.

Though it never seems to make a difference for me with free motion quilting, dropping the feed dogs on my machine helped a lot with ruler work.

I needed to put more pressure on the ruler than I initially thought. Simply resting one hand on the ruler resulted in a lot of slippage. Really get a good grip on that ruler!

Happy sewing, everyone!

Wednesday, September 20, 2017

Improv Quilting and the Blogger's Quilt Festival

I recently took a class in improv quilting and, boy, did it get the creative juices flowing! I loved the thrill of trying something new, I loved the freedom the technique allowed, and I loved creating something with such modern flair. I lucked out in that I had an excellent teacher, the talented Mary Menzer, who has created some amazing modern quilts using this technique. She patiently shared her knowledge with the class and helped us to create our own improv pieces.

I was quite pleased with my class sample and quickly began another wall hanging. I stepped away from my usual palette of blues and greens and used bright warm tones for my second improv piece.  I call this one Sherbert. It's a small wall hanging, measuring at 15" by 14 1/2". I used mostly Kona solids, along with a couple low volume prints and one linen-like solid. It's quilted using matchstick quilting in a variegated Aurifil thread.


The Blogger's Quilt Festival, hosted by Amy Gibson of Amy's Creative Side, was the perfect opportunity to share this little project. Amy does so much to make the online quilting community the dynamic group that it is, and the Blogger's Quilt Festival is just one part of that. Enjoy all the amazing eye candy shared in the festival by clicking through the links. Thank you to Amy for all your work organizing this event and to the sponsors who make it extra fun!

Wednesday, August 16, 2017

Apples to Oranges

Who doesn't love finding a good use for scraps? My latest project on the Moda Bake Shop is an apple core quilt using The Good Life, Bonnie and Camille yummy new fabric line. It was a fun project, but one that resulted in some decidedly non-rectangular scraps.

I quickly realized these scraps left over from the fabric between each apple core shape would be perfect for orange peels, one of my favorite quilt blocks to make. I wrote up a mini quilt pattern that uses these yummy scraps, called Freshly Peeled. It's a fun, quick little project that can be made using scraps or any small bits of fabric you have in your stash. If you haven't tried machine applique, this project would be a great introduction to the technique!

You can download both the apple core pattern and the mini quilt pattern for free! Check out the Moda Bake Shop for the apple core quilt and Craftsy for the mini orange peel pattern.

Just because it makes me happy to share pretty things, I'm giving away this sweet little mini quilt. To enter, share some thoughts on mini quilts in the comments. Have you made one? Do you enjoy creating smaller projects? I'll pick a winner on the 7th of September.

Happy sewing, everyone!


a Rafflecopter giveaway

Tuesday, August 8, 2017

Solid Love

I love working with solids. The range of colors available is awe-inspiring. It's almost unreal how many variations of a single color we have to choose from.

Both Moda and Kaufman have sample cards available with the full line of solids available. Kaufman even has a panel of fabric available! While one of these would be awesome, I prefer to put those funds towards other fabric purchases and came up with a quick and easy DIY swatch system.

Each time I use a solid, I staple a swatch to an index card and file it in a coupon holder. Nothing fancy, but it allows me to easily match up colors, see the different shades I've used in the past, and make choices for future quilts.


Saturday, July 8, 2017

Hashtag Awesome!


This might be the summer of Instagram for me. I've had an Instagram account for a few years, but didn't do much with it for a long time. I friended a few folks, looked at some nice pictures, and that was pretty much it. This year, however, I discovered the vibrant quilting community that exists on the social media site, and it is now a much bigger part of my social media life.

My big turning point was participating in Amy Ellis's Instagram Quiltfest (#IGquiltfest) earlier this year. The daily prompts were so much fun and encouraged me to post more and seek out other quilters. From there, I quickly found a plethora of quilt-alongs, fabric swaps, mini-quilt exchanges, and contests.

It wasn't long before I was deep in the world of swapping. There are ample opportunities to swap both fabric (charm squares are a popular size) and finished items, such as mini quilts. I just received three fun packages this week (#happymail, in Instagram parlance), each a different type of swap.

The first was text print charm squares (#textycharmswap), in which I sent a set number of identical charm squares of a given text print and received the same number back of different text printsso much fun! The variety was amazing!


One of my blocks for the Sweetwater Swap
I love the fun fabric the ladies of Sweetwater design and was excited to participate in a Sweetwater block swap (#swjulystarswap). For this one, each participant made blocks following the same pattern and using only Sweetwater fabric. We sent the blocks to our generous and patient hostess and received back different blocks. I loved seeing fabric from older, out of print lines I hadn't seen in person. I made a few different blocks, and made an extra of each style for myself, so I now have enough blocks for a pretty sweet quilt! Not only is it fun to work on my own project, but I love seeing the other quilts from the swap come together. There were so many different blocks, I think each swapper received a unique package!

The third package was a finished item, a mini-quilt, that was exchanged through a paper piecing themed swap (#fortheloveoffppswap). So much fun! I truly had as much fun making a quilt to swap as I did receiving a surprise package. Quilters are such a generous lot, and my swap buddy included some fun little extras. What a treat to get a fun package in the mail!

Instagram has a truly vibrant quilting community. It is such a joy to be a part of such warmth and creativity. If you are not already on the site, check it out!


Monday, May 22, 2017

Straight Line Quilting


I've talked about straight line quilting before here on the blog. It's an easy, modern quilting choice and it adds a lovely texture to the quilt, especially when the lines are spaced closely together. It’s a great choice for those new to machine quilting or those looking for a quick quilting option. It doesn’t require maneuvering the quilt too much (you can just roll it up as you go), minimizing those quilt tug-of-wars.

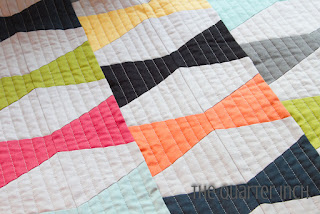
I find it easiest to use the edge of the walking foot as a guide. I have guide bars that can be added to my walking foot and I'll often mark quilts, but nothing beats the ease of simply lining up the edge of your walking foot with a seam or a quilted line. When quilting my Bowties quilt, I wanted the lines spaced a half inch apart. Neither the edge of the walking foot nor the notch marking a quarter inch helped much, and I wished the edge of my walking foot was just a smidge further away from the needle. Then, it hit me—my needle can move! A-ha! I shifted my needle over to the right a bit, allowing me to line up the edge of the walking foot with the seam in the quilt for precise half inch quilting lines. Awesome!


Some disclaimers—make sure your needle will not strike your walking foot. Broken needles are no one’s friend! And be sure to return the needle to the center position before moving on to another sewing task. You need that quarter inch seam to be precise!

Happy sewing!


Saturday, May 6, 2017

Tumbling Along: All About Tumblers

I love the striking simplicity of one shape quilts. My latest project for the Moda Bakeshop is a tumbler quilt with a twist. I call it Bowties, and it’s made using solids.


All tumbler quilts are made from a symmetric trapezoid shape, but did you know there is no set measurement for the angles of the shape? Tumblers can be tall and skinny, short and squat, or anything in between. There are rulers specifically for tumblers on the market, and you can also use triangle rulers or Dresden plate rulers. I chose to use a 30-degree ruler for Bowties so the shape of the bowties would be nice and perky.

Tumbler quilts have a long history in the quilting world. This beauty dates to the 1800s and tumblers were particularly fashionable in the 1930s and 1940s.

Though a little tricky at first, tumbler quilts are easy to put together once you get the hang of lining up the pieces. You don’t want to sew the edges point to point; rather, you want a little overhang on each side so that the ¼” stitching line crosses precisely where the two fabrics meet. When pinning two pieces together, offset the edges just enough so that the quarter inch stitching line will intersect the two pieces. Picture the edges of the fabrics as making an X. You want your stitching line to go right through the center of the X.

There are lots of variations when working with tumblers. They are traditionally set in rows, but you can set them in columns, as I did, for a different look. You can make a lantern-type shape by using the same fabric for two tumblers, one right on top of the other. Even the popular half hexie quilt is really just a short, squat tumbler quilt! 

Have you ever made a tumbler quilt?


Saturday, April 29, 2017

Made With Love

Like many quilters, I gift a lot of my quilts. It truly brings me joy to give a handmade quilt someone I care about. I especially like making baby quilts to welcome little ones. Babies need snuggles!

Recipients of my quilts commonly ask me about washing instructions. I know some people write this information right on the quilt label, but I am not much of a labeler (I know, I know! I need to work on this!). I recently printed a bunch of business cards with washing instructions to tuck into the quilts I gift. Easy and inexpensive! You can easily print your own using a business card template available on any number of printing sites.

I ordered a lot of these cards, more than I need! I'd love to send ten cards to two different readers. Simply follow the prompts on the Rafflecopter widget below. Happy sewing, everyone!


a Rafflecopter giveaway

Tuesday, April 18, 2017

Charm School: Book Review

I love charm packs. I’ll often pick up one or two of these yummy fabric treats as a little indulgence for myself. Vanessa Goertzen of Lella Boutique is one of my favorite fabric designers, and I have more than a couple charm packs by this talented woman in my stash! Her new book, Charm School—18 Quilts from 5” Squares: A Beginner’s Guide, features projects using charm squares. The quilts are luscious and beautifully photographed and I wanted to dive right into a few of them!

The book is geared towards beginners and would be a great way for someone new to quilting to progress from sewing squares to more complex shapes. Though none of the projects are overly complicated, several are far from simple and would appeal to more advanced quilters. My favorite is Lunch Box with its controlled wonkiness. Madame Butterfly is another standout that will certainly appeal to quilters of all levels.

Though the patterns are designed to be used with charm packs, I love that Goertzen gave instructions for using other cuts of fabric, allowing readers to make the best use of their stashes. The instructions clearly explain how many cuts you need so you could even mix and match charm packs with other sizes of fabric.

My only critique is that I would have liked to see one or two projects that require just one charm pack. I don’t always buy multiples of charm packs, and a wall hanging or mini-quilt that used a single charm pack would have been a good addition, as most projects in the book require three or four charm packs.

Charm School would make a great addition to any quilter’s library, especially if you love precuts as much as I do!

Wednesday, April 12, 2017

Pressing Matters

I invested in a Rowenta iron for my quilting about a year or two ago and was more than a little annoyed to see that my iron was occasionally spitting out brown spots. Well, dear reader, I am embarrassed to admit that the problem was with me, not the iron. I was not properly maintaining my iron. Bad quilter! I am owning up to my mistakes in the hopes I can prevent others from finding those yucky brown spots on their fabric!

My research (that is, finally reading the manual and Googling iron maintenance) turned up three important actions that I was not taking and likely caused the rust build-up inside my iron. (Hangs head in shame.)

1-If your iron has a self-cleaning function, use it every two to four weeks.
2-When starching, spray the starch on one side and iron on the other.
3-Empty the reservoir before storing the iron.

After running the self-cleaning function several times (once with a vinegar-water mixture—check if this is recommended for your iron before trying), I am happy to report my iron is working well! I am embarrassed that I was not doing a better job taking care of my iron, but promise to be better in the future!

And, as if it was a reward for promising to take better care of my iron in the future, I picked up this beauty for a steal at my local Habitat ReStore! Practically a twin of the one I have! 


Happy pressing, everyone!

Sunday, April 2, 2017

Stitching in Portofino

I recently discovered the awesomeness that is Aurifil thread. It just glides over projects! The wonderful folks at Aurifil and Whole Circle Studios even created a fun little wall hanging to celebrate the yumminess of this thread. I played along, creating a version in my favorite palette of blues and greens. I named this mini-quilt Stitching in Portofino, a nod to Aurifil’s Italian home. The Italian coast is especially beautiful and I have wonderful memories of a day spent exploring the seaside town of Portofino. There are so many blues to be seen there, from the vibrant blue of the sky to the dark blue of the deep water by the rocky shore to the blue-green of the tide pools. Such beauty!

I entered my mini-quilt in a contest and I would so appreciate it if you would vote for my project. You can see all the fabulous entries here. Mine is the second one, Stitching in Portofino. You can vote by clicking on the heart in the upper right of the picture. Easy peasy! Thank you!


Sunday, March 12, 2017

In My Pocket

My latest quilt is up on the Moda Bake Shop and it’s a fun one called In My Pocket! I designed a block in honor of Zen Chic’s latest fabric line, True Blue, that is based on the back pocket on a pair of  jeans. 


The pattern on the Bake Shop uses a layer cake and makes a big, fun block! I thought it would be fun to also design a scaled down version using charm squares.

Referring to the larger pattern for some more details on the block, use the instructions below to make a mini version of In My Pocket. This little quilt finishes at 40” by 49”. Happy sewing!


In My Pocket: Mini Version

Materials Needed
Two charm packs
1 yard of background fabric
½ yard binding fabric
1 ½ yards of backing fabric (Note: This amount of backing fabric only gives two inches of extra fabric on each side, assuming your fabric is 44” wide. If you need more overage, plan accordingly!)
60-degree triangle ruler (optional)

Constructing Pocket Blocks
Take 36 charm squares. Fold in half and trim bottom using 60-degree ruler as shown on the larger version of this pattern. Alternately, you can trim from 1 ½” up the side of the square to the center.

Cut two 3 ½” strips from background fabric. Cut strips into [36] 3 ½” by 2” rectangles. Cut rectangles diagonally to make triangles.

Sew triangles of background fabric to the bottom of charm square as shown on the larger version of the pattern.

Take 36 charm squares. Cut a 2” by 5” piece from each. Set aside the remainder of charm square for the border.

Sew the 2” by 5” piece to the top of the block to make the pocket block.


Your block should measure 6 ½” by 5”. It will finish at 6” by 4 ½”.

Lay out blocks, using the quilt diagram as a reference.


Sashing
From background fabric, cut five strips 1 ½” by WOF. Subcut into [30] 1 ½” by 6 ½” rectangles.

Add 1 ½” by 6 ½” sashing strips between each block. Do not add sashing to the left and right sides.

From background fabric, cut five strips 1 ½” by WOF. Trim each strip to 1 ½” by 32 ½” strips.

Add 1 ½” by 32 ½” sashing strips between each row. Do not add sashing to the top and bottom.


Border 1
From background fabric, cut four strips 2 ½” by WOF. Trim two strips to 41 ½” by 2 ½” and two strips to 36 ½” by 2 ½”. Attach to sides and top.


Border 2
From the remains of the charm squares, cut [36] 2 ½ by 5” rectangles.

Take eight and sew end to end. Repeat. Take ten and sew end to end. Repeat.

From remaining charm squares, cut [4] 2 ½” squares for corner units. Sew to ends of eight rectangle units.

Sew ten rectangle units to the sides of the quilt. Sew the eight rectangle units to the top and bottom.


Finishing
Sandwich, baste, and quilt.

Bind.


The quilt finishes at 40” by 49”.

Monday, February 20, 2017

White, White or White?

When I need solids for a project, my go-to fabric choice is Kona Cotton by Robert Kaufman. There's a store not too far from me (though not close enough...) that carries all the colors of Kona cotton (more than 300!), and it is a joy to behold.

Quilters often struggle to find the perfect white. You don't want a fabric that is blinding, but you don't want one that is too creamy, either. The three neutrals I use most often are Kona White, Kona Snow, and Kona Bone.


Kona White is a true white. It's great when you need a really white white, say for autograph squares. It pairs wonderfully with cool colors, but I find it to be too stark for most quilts. Even when you think you want a white, you probably want a fabric that is slightly off white.

That brings us to Kona Snow. This is a pretty perfect neutral, and it is insanely popular among quilters for good reason. Perfectly blendable, the fabric is not too stark and not too yellow. It's white enough without being glaringly white. When in doubt, reach for Snow! I've used it as a background fabric many times and it hasn't failed me yet.

I'm also a big fan of Kona Bone. Slightly more antique feeling, it has a touch of warmth, making it a perfect complement for reproduction prints or warm fabrics. I use Bone when I want the background of the quilt to have the slightest bit of creaminess. 

I recently used Kona Silver as a background fabric. While certainly not white, the light gray was an ideal modern neutral. I like using a non-white for backgrounds, and the Kona Silver allowed the main fabric to pop while providing a bit more visual interest.

The right neutral background is such an integral piece of your quilt. What are your favorite neutrals?

Sunday, January 15, 2017

Aurora

My latest project is up on the Moda Bake Shop! Aurora is a fun, bright quilt that features Lulu Lane, Corey Yoder's latest fabric line.


I love the happy, scrappy look of this project. I used a variety of fat quarters for the project, but I think it would look stunning as a two color quilt, as well. Check out this illustration.


The quilt posted on the Bake Shop is quite largea full sized bed covering! That might be too ambitious for some, I know. The good news is that this quilt is super easy to resize. Each fat quarter makes two full blocks and each block finishes at 12 inches. To resize, figure out how many blocks the quilt requires and divide that number in half to determine how many fat quarters you need. Easy peasy! Here are two additional sizes:

Baby quilt (36" by 48")
This quilt is arranged in a three by four layout (that is, four rows with three blocks in each row). You will need six fat quarters for this version.  

Throw quilt (48" by 60")
This quilt is arranged in a four by five layout (that is, five rows with four blocks in each row). You will need ten fat quarters for this version.  

I think this quilt would look great with a border, or with sashing between the blocks. I even toyed with setting the blocks on point. So many interesting possibilities with this block. Have fun making it your own.

Happy sewing!